Site Editing Guide#
GSoC site uses OpenBeagle Continous Integration (CI) / Continous Development (CD) which is a continuous method of software development, where you continuously build, test, deploy, and monitor iterative code changes. which means you don’t have to setup anything on your local machine to update anything on the site. To contribute to this site, you can follow the simple steps provided below.
Note
OpenBeagle is a self hosted instance of open source program called GitLab.
Tip
If you want to build on your local machine we have added venv-build-env.sh and requirements.txt
to help you setup sphinx and all the other dependencies. Execute these commands in your terminal,
Install python modules and setup virtual environment,
. ./venv-build-env.sh
Build and serve it live using sphinx-autobuild,
make livehtml
Now, you can open http://127.0.0.1:8000 on any browser to see the rendered HTML with live updates. Clear cookies and site data in your browser window to view up to date site.
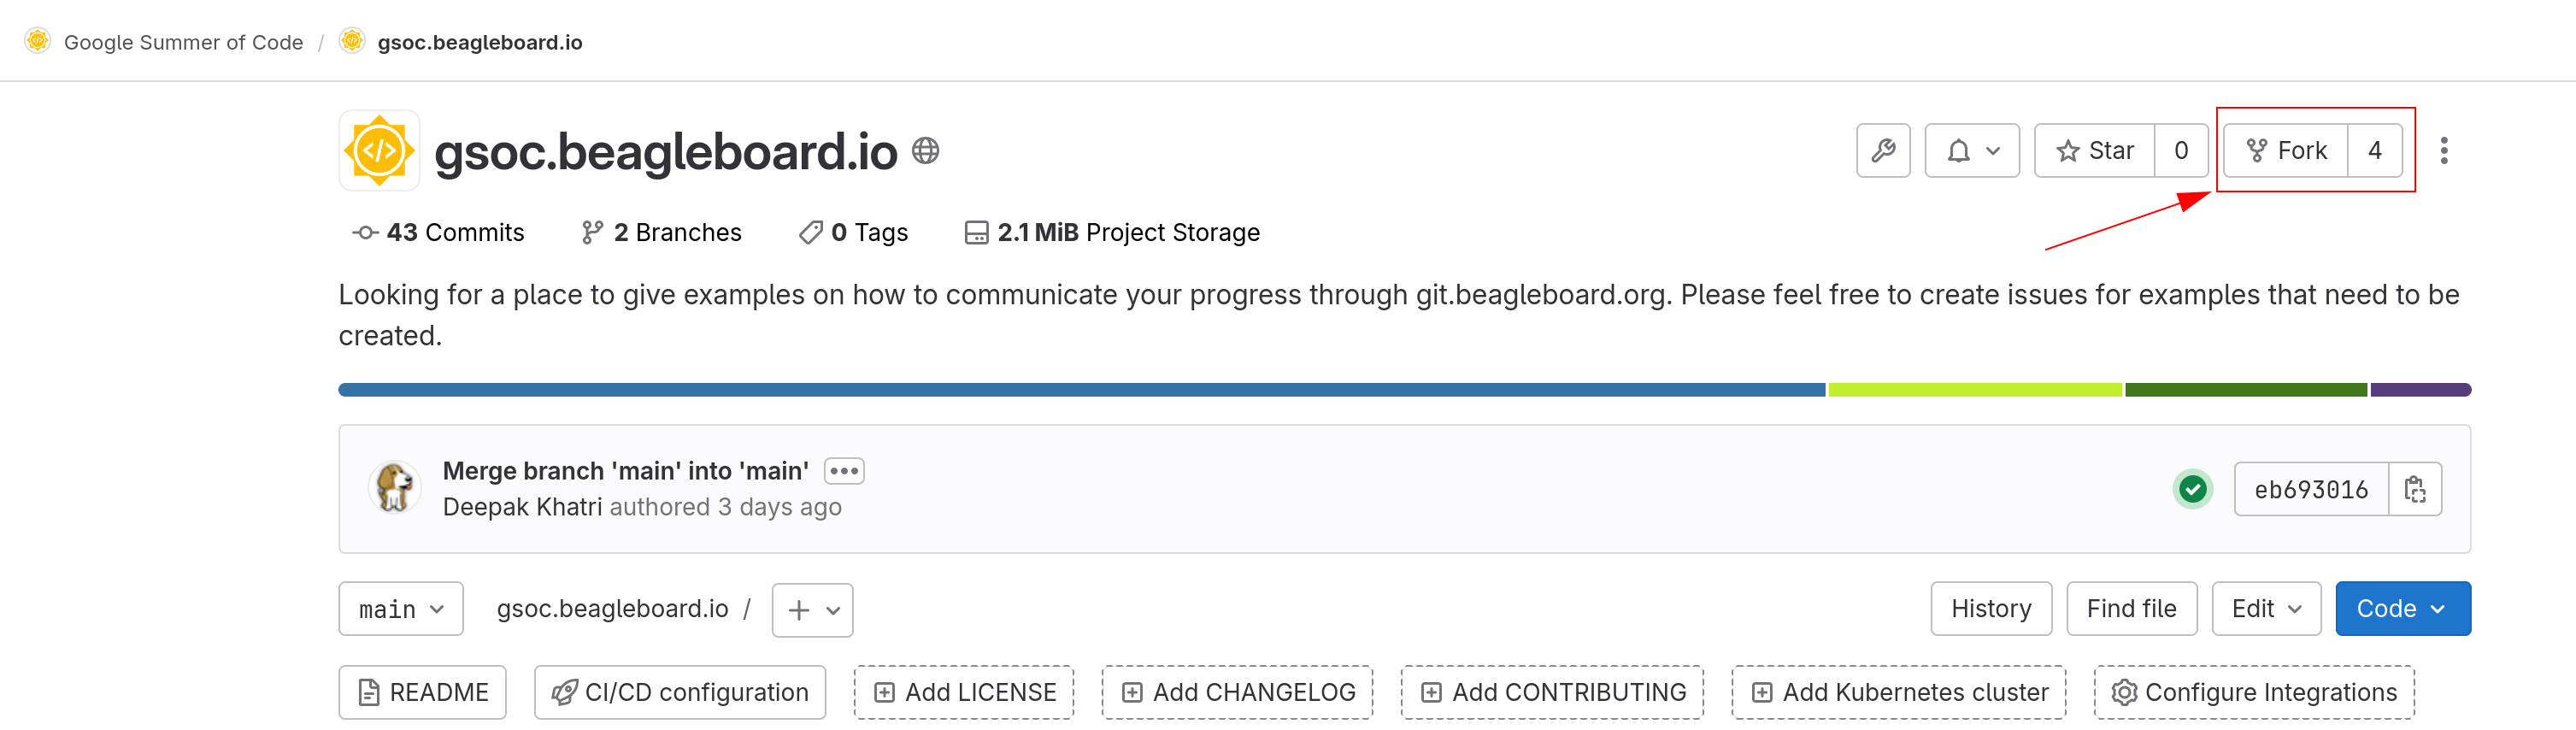
Fork the project#
Go to gsoc.beagleboard.io repo on OpenBeagle and click on fork button create a fork on your personal OpenBeagle profile.
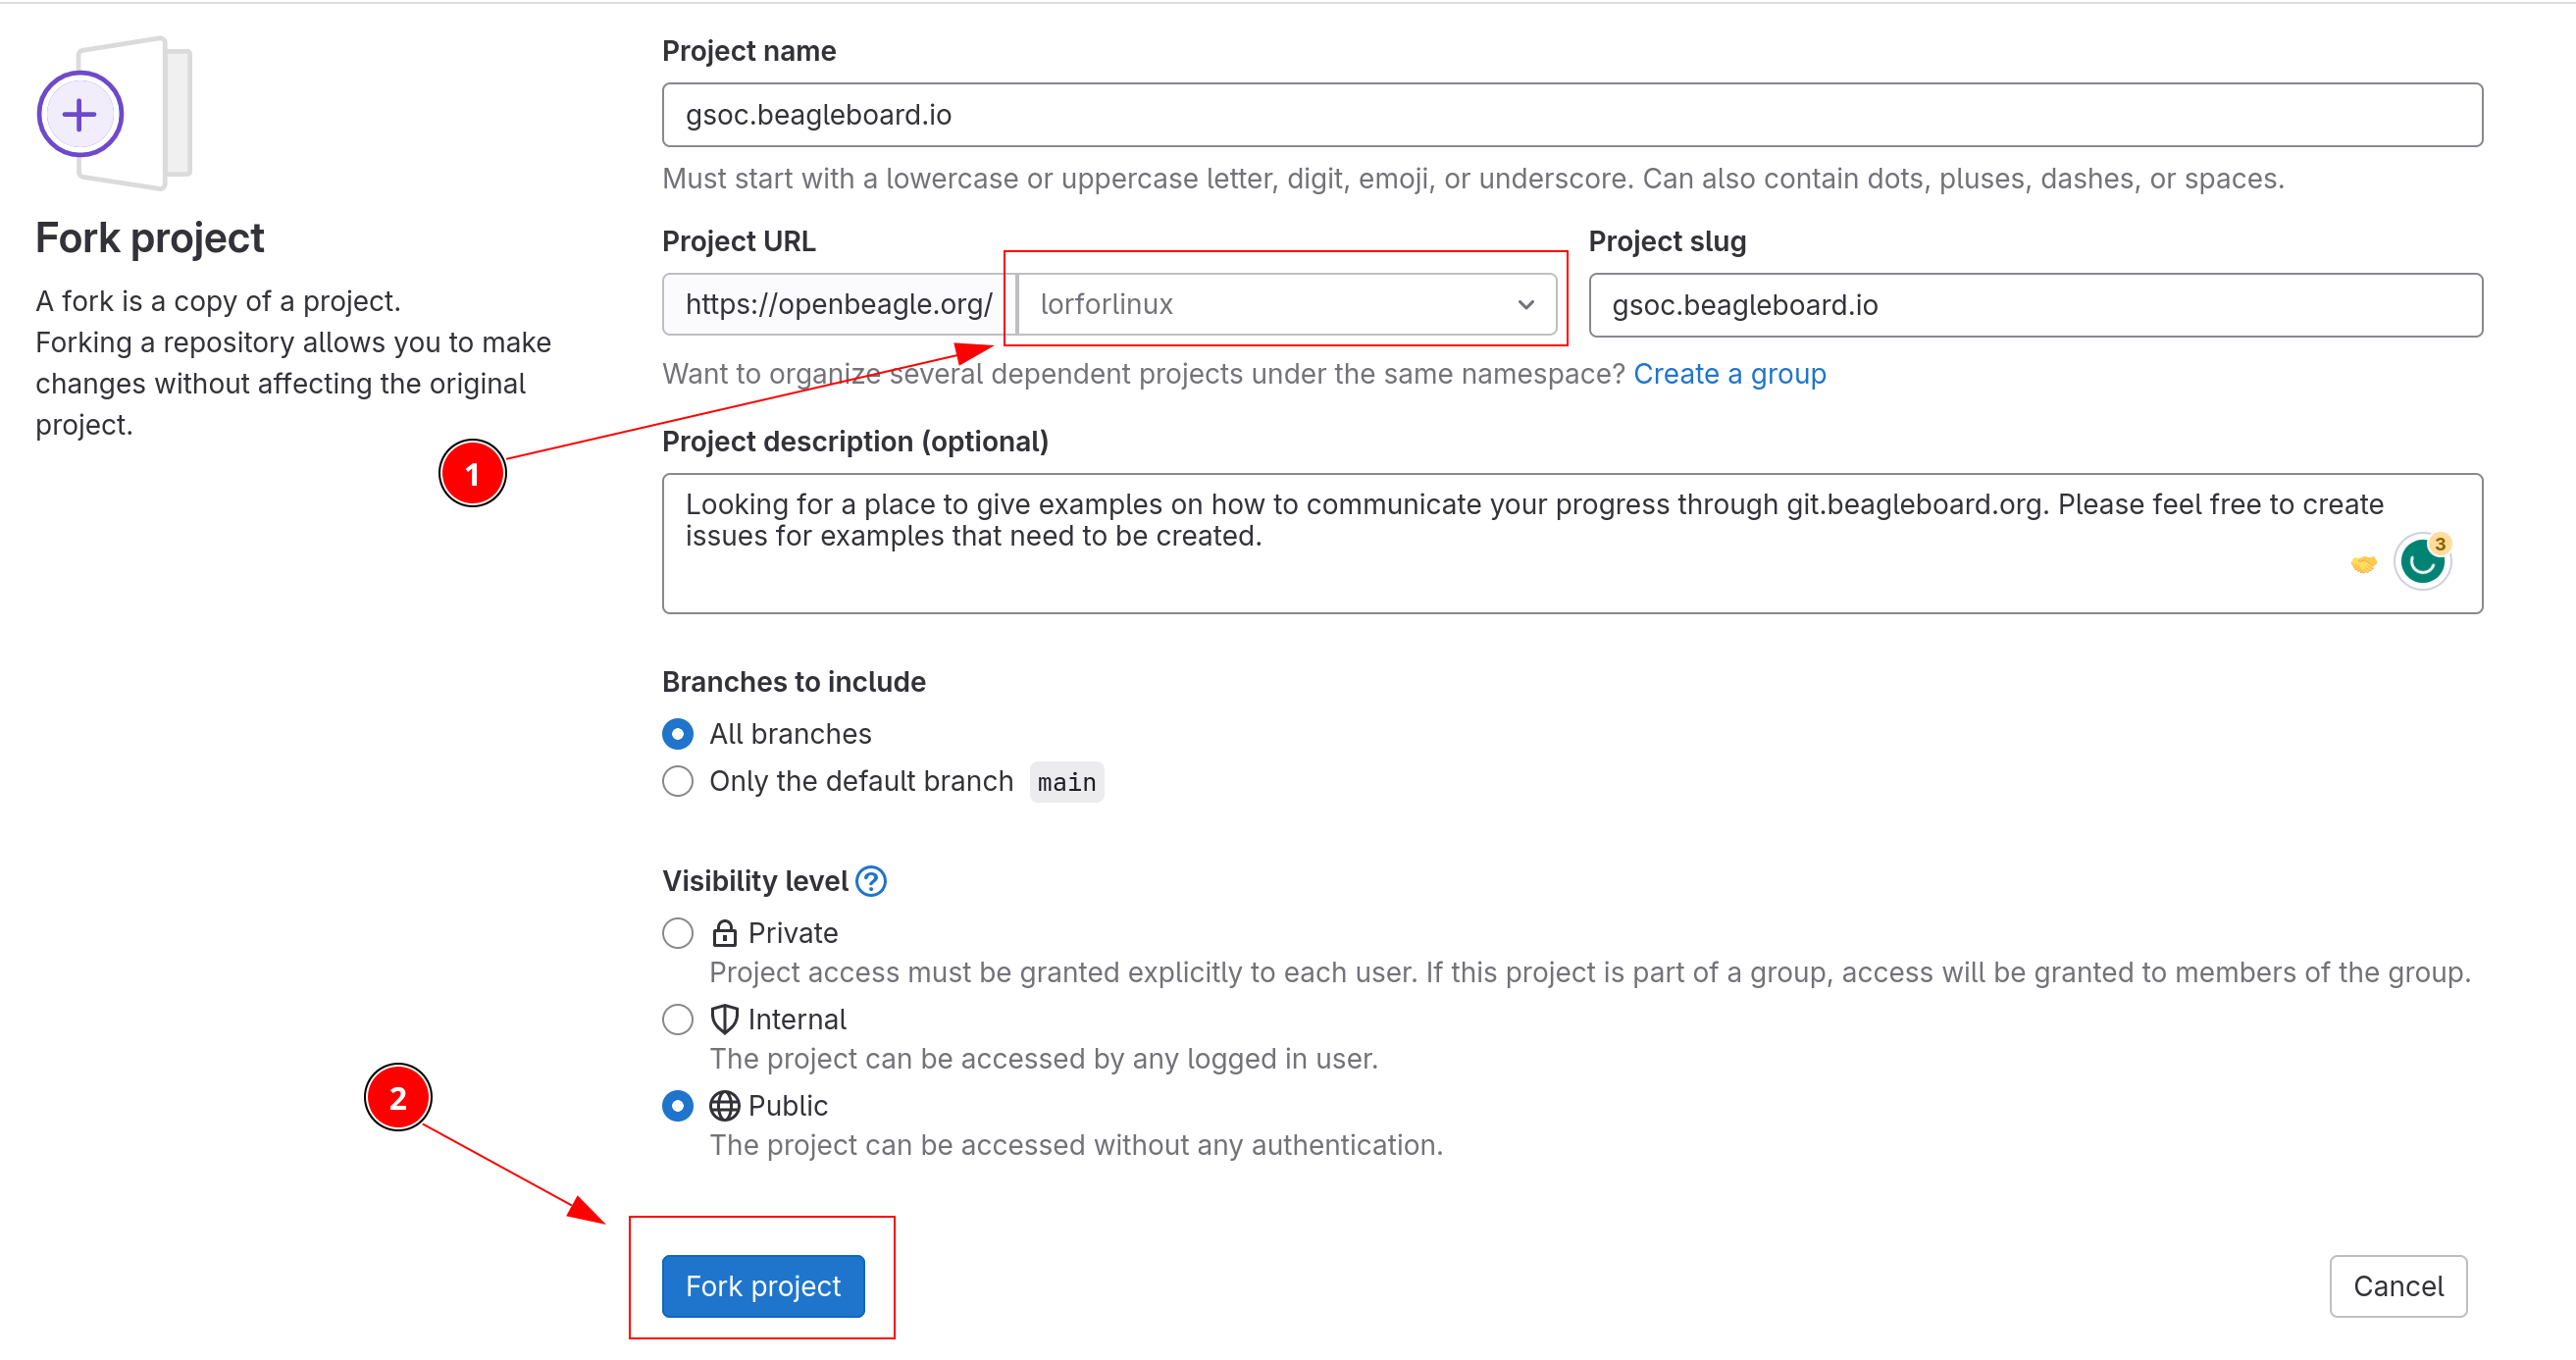
After clicking on the fork button, you’ll be taken to a page like shown below where you have to,
Select your profile from the dropdown.
Click on fork project button to initiate the forking process.
Select file to edit#
After successfully forking the project you have to,
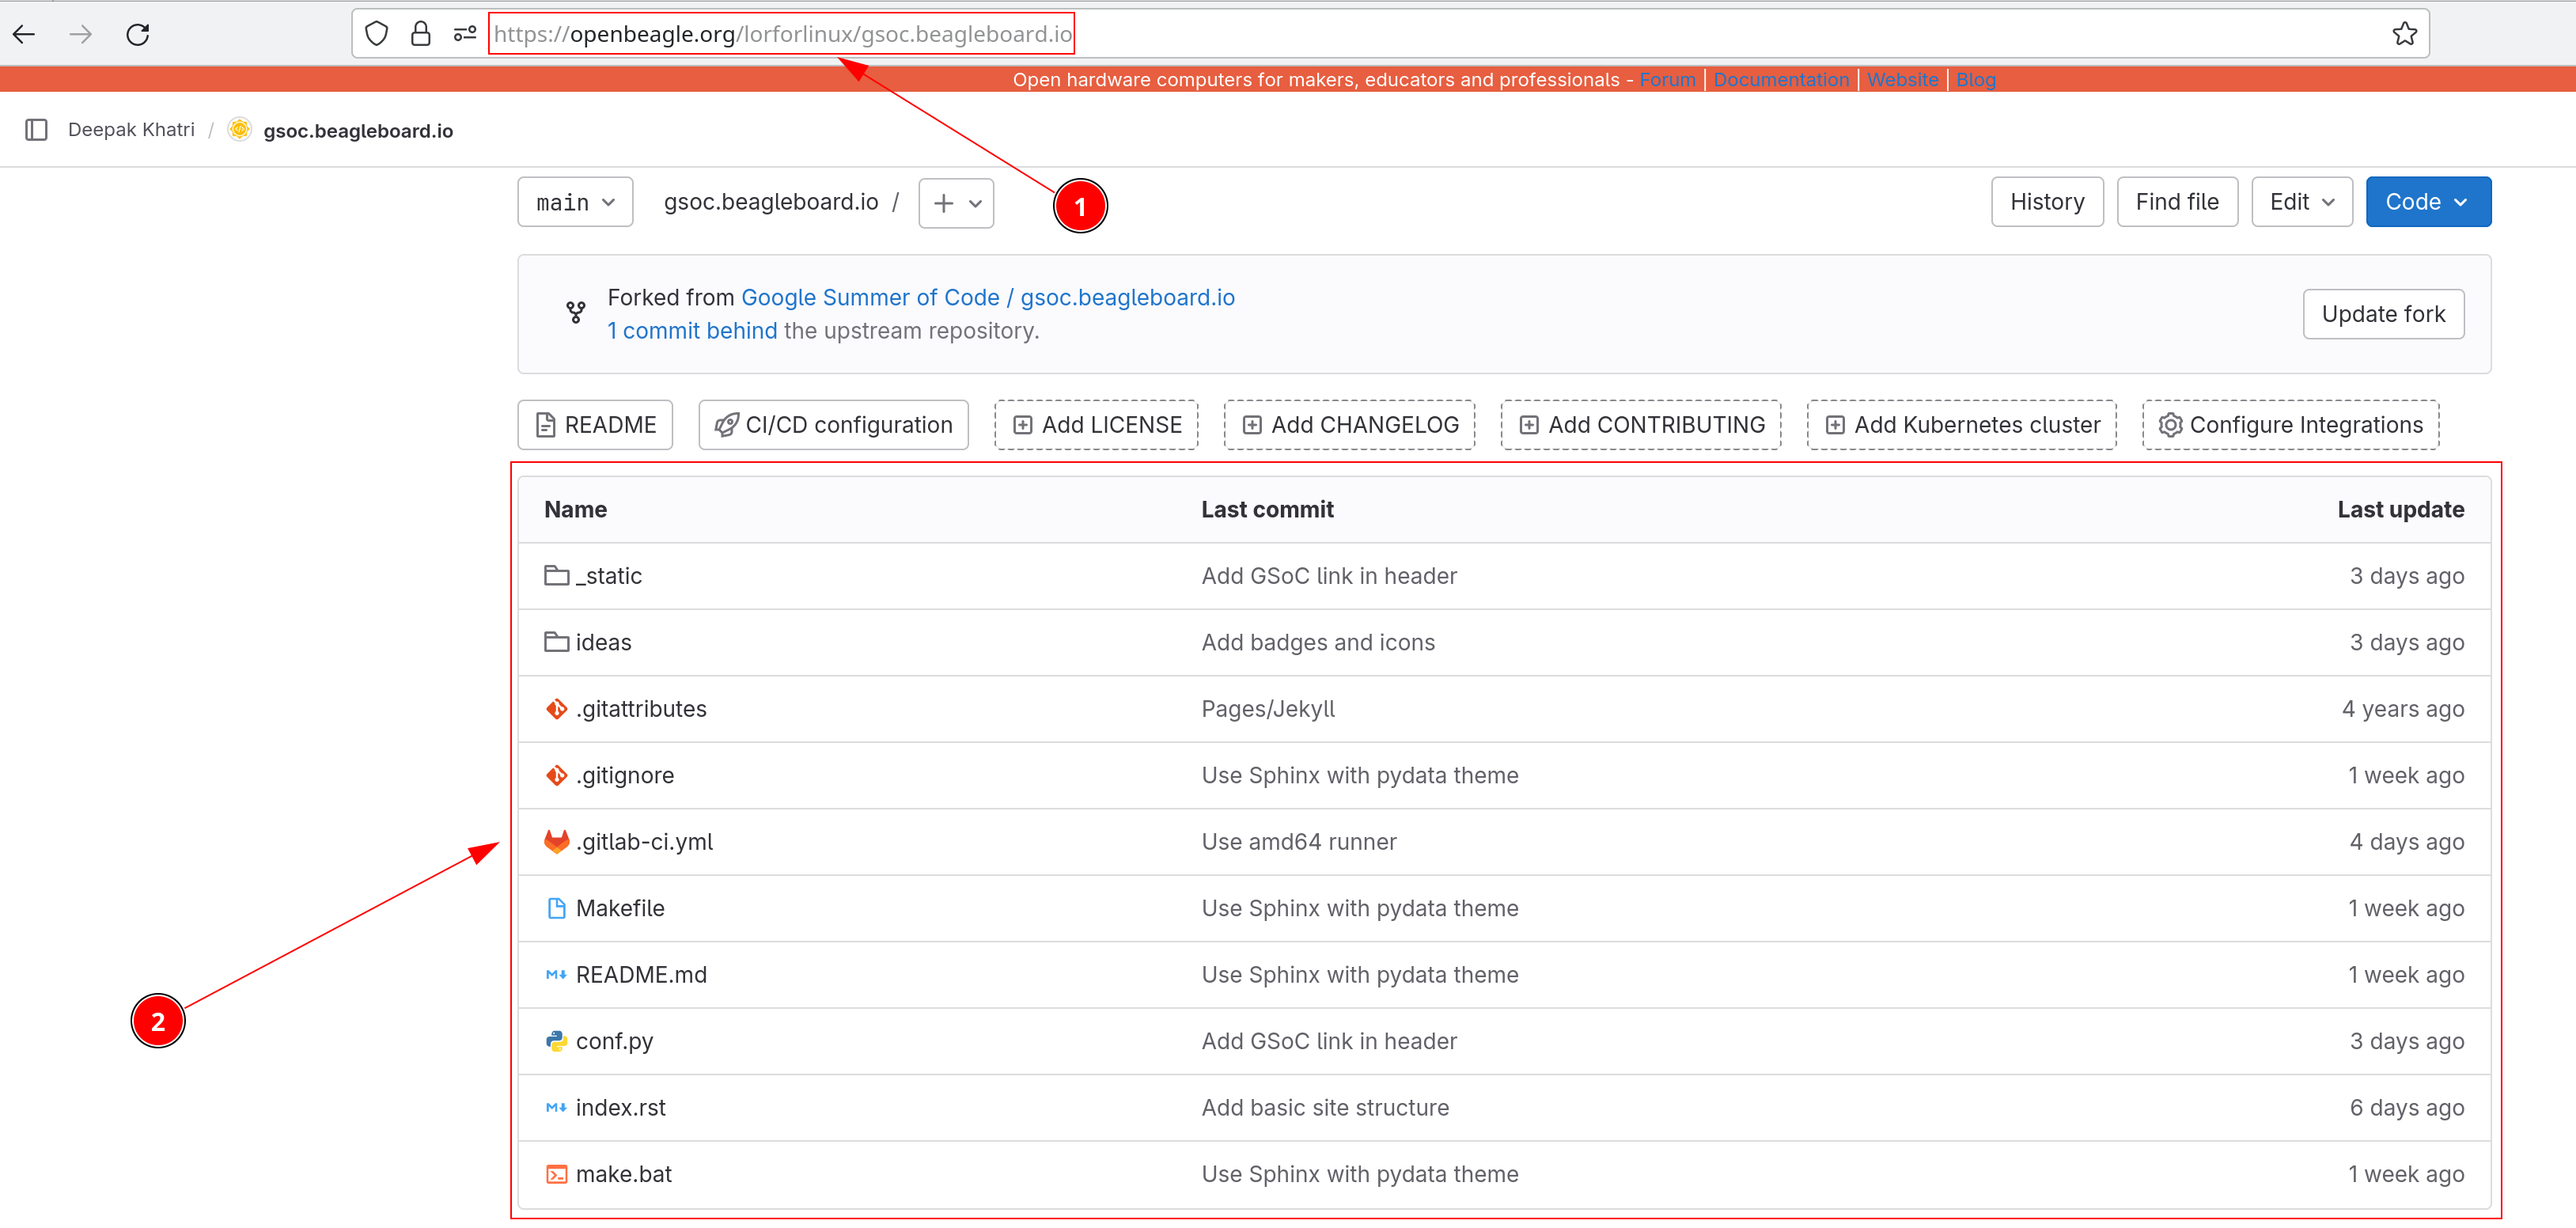
Make sure you are on the forked repo on your profile, it should be
https://openbeagle.org/<user-name>/gsoc.beagleboard.iowhere <user-name> should be replaced with your OpenBeagle username.Select any file you want to edit from the files & folders view of the repo page.
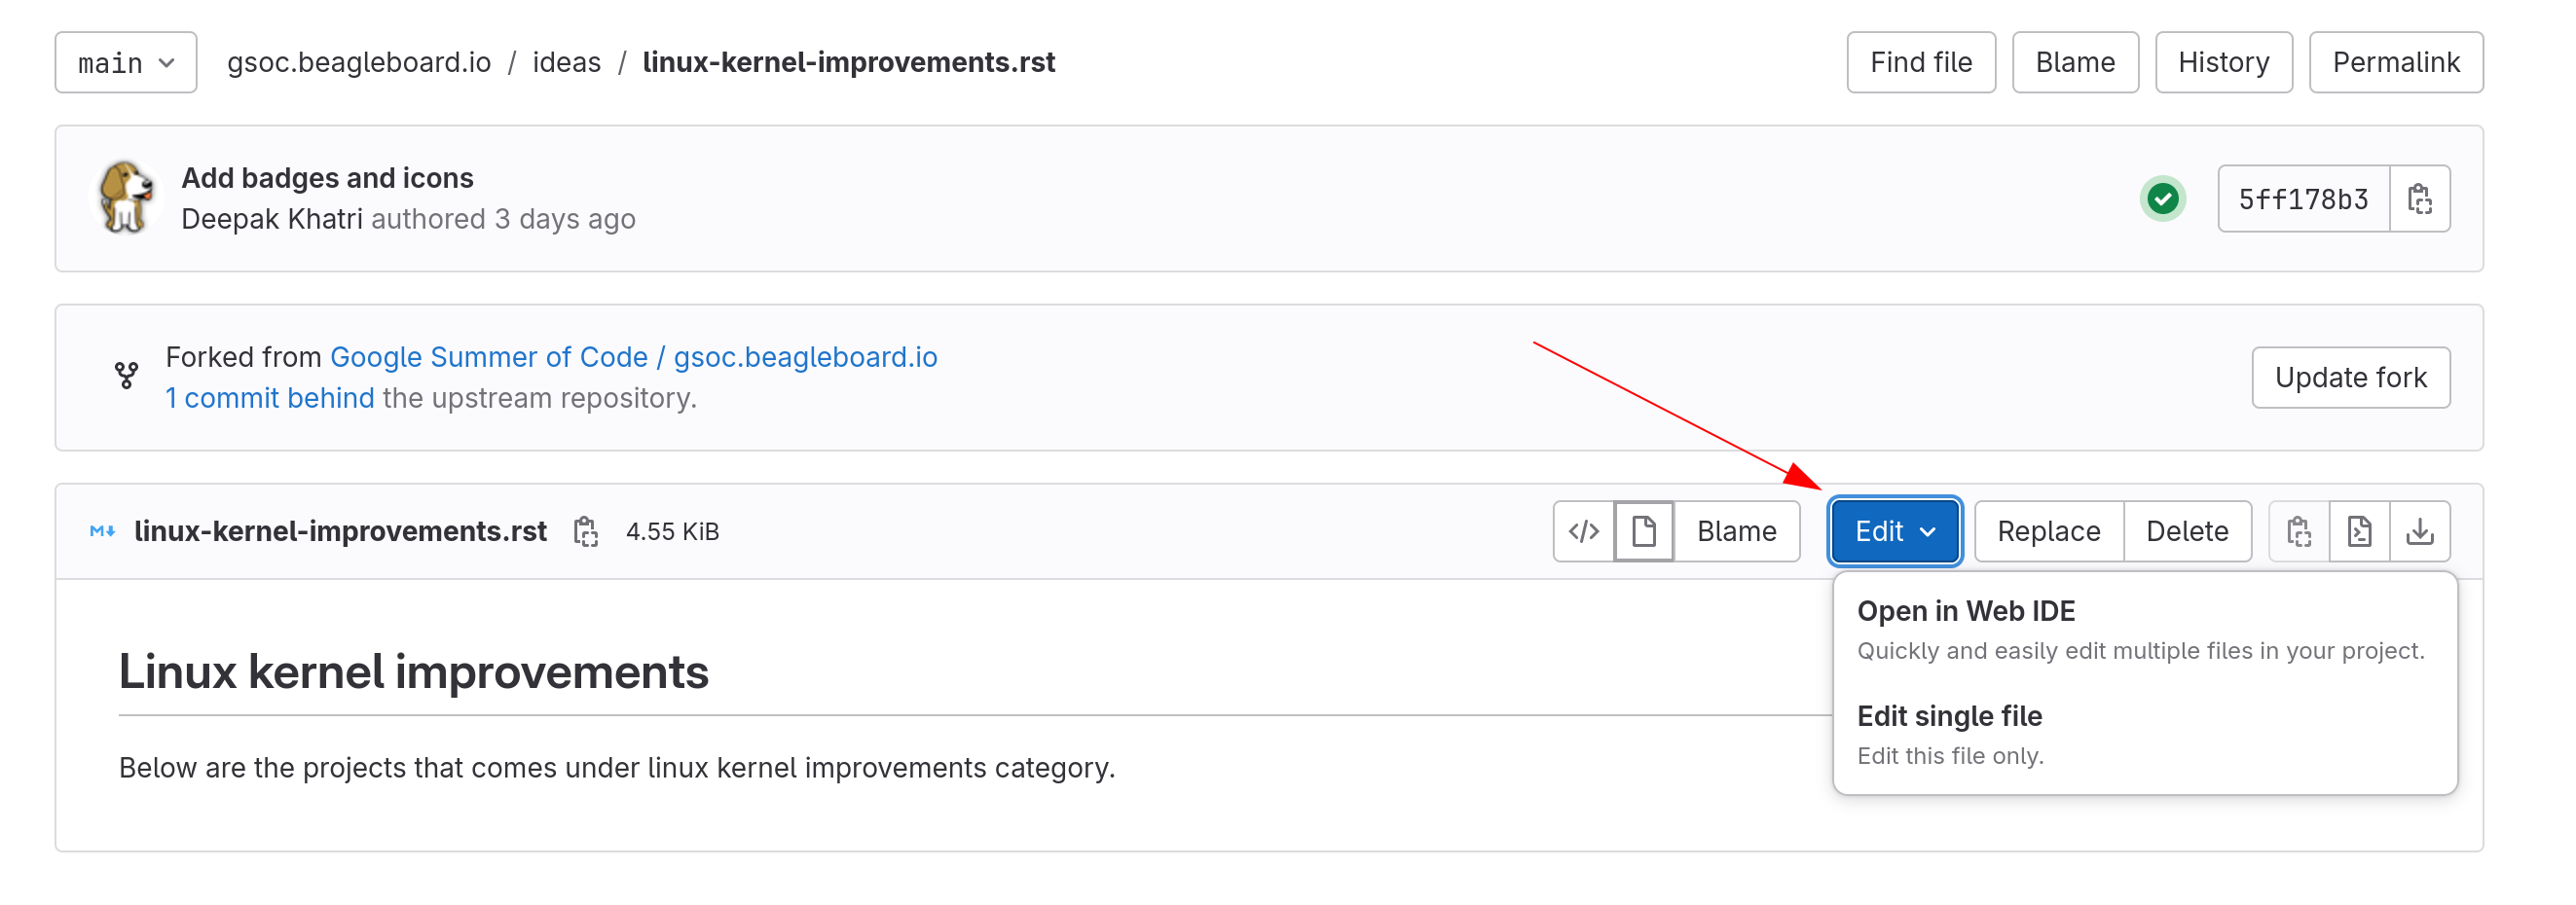
After selecting the file you have to click on edit button and then choose either of the options from drop-down,
Open in Web IDE, choose this if you want to work on multiple files.Edit single file, choose this if you want to make some small edits in a single file.
Note
Choosing Web IDE will load a Visual Studio Code Server
instance which is a feature rich source code editor. Depending on the internent connection, your machine will take some time to
load the editor and it can be a bit heavy for some machines to handle. Once fully loaded it should run smoothly but, if that is
not the case then please consider using single file editor option. Considering majority of the users will be using Web IDE option,
we are using the Web IDE for the rest of this guide.
Start editing#
If you select to open your file in Web IDE you’ll see a familar interface. The GitLab Web IDE is actually a rich
Visual Studio Code Server hosted on OpenBeagle.
Tip
We use reStructuredText (RST) for all of our documentation projects including this GSoC site and main docs site. If you are new to reStructuredText you can checkout our reStructuredText cheatsheet to get yourself familiar with reStructuredText.
Why not use Markdown for documentation?
Because reStructuredText stands out against Markdown as,
It’s more fully-featured.
It’s much more standardized and uniform.
It has built-in support for extensions.
For more detailed comparison you can checkout this article on reStructuredText vs. Markdown for technical documentation
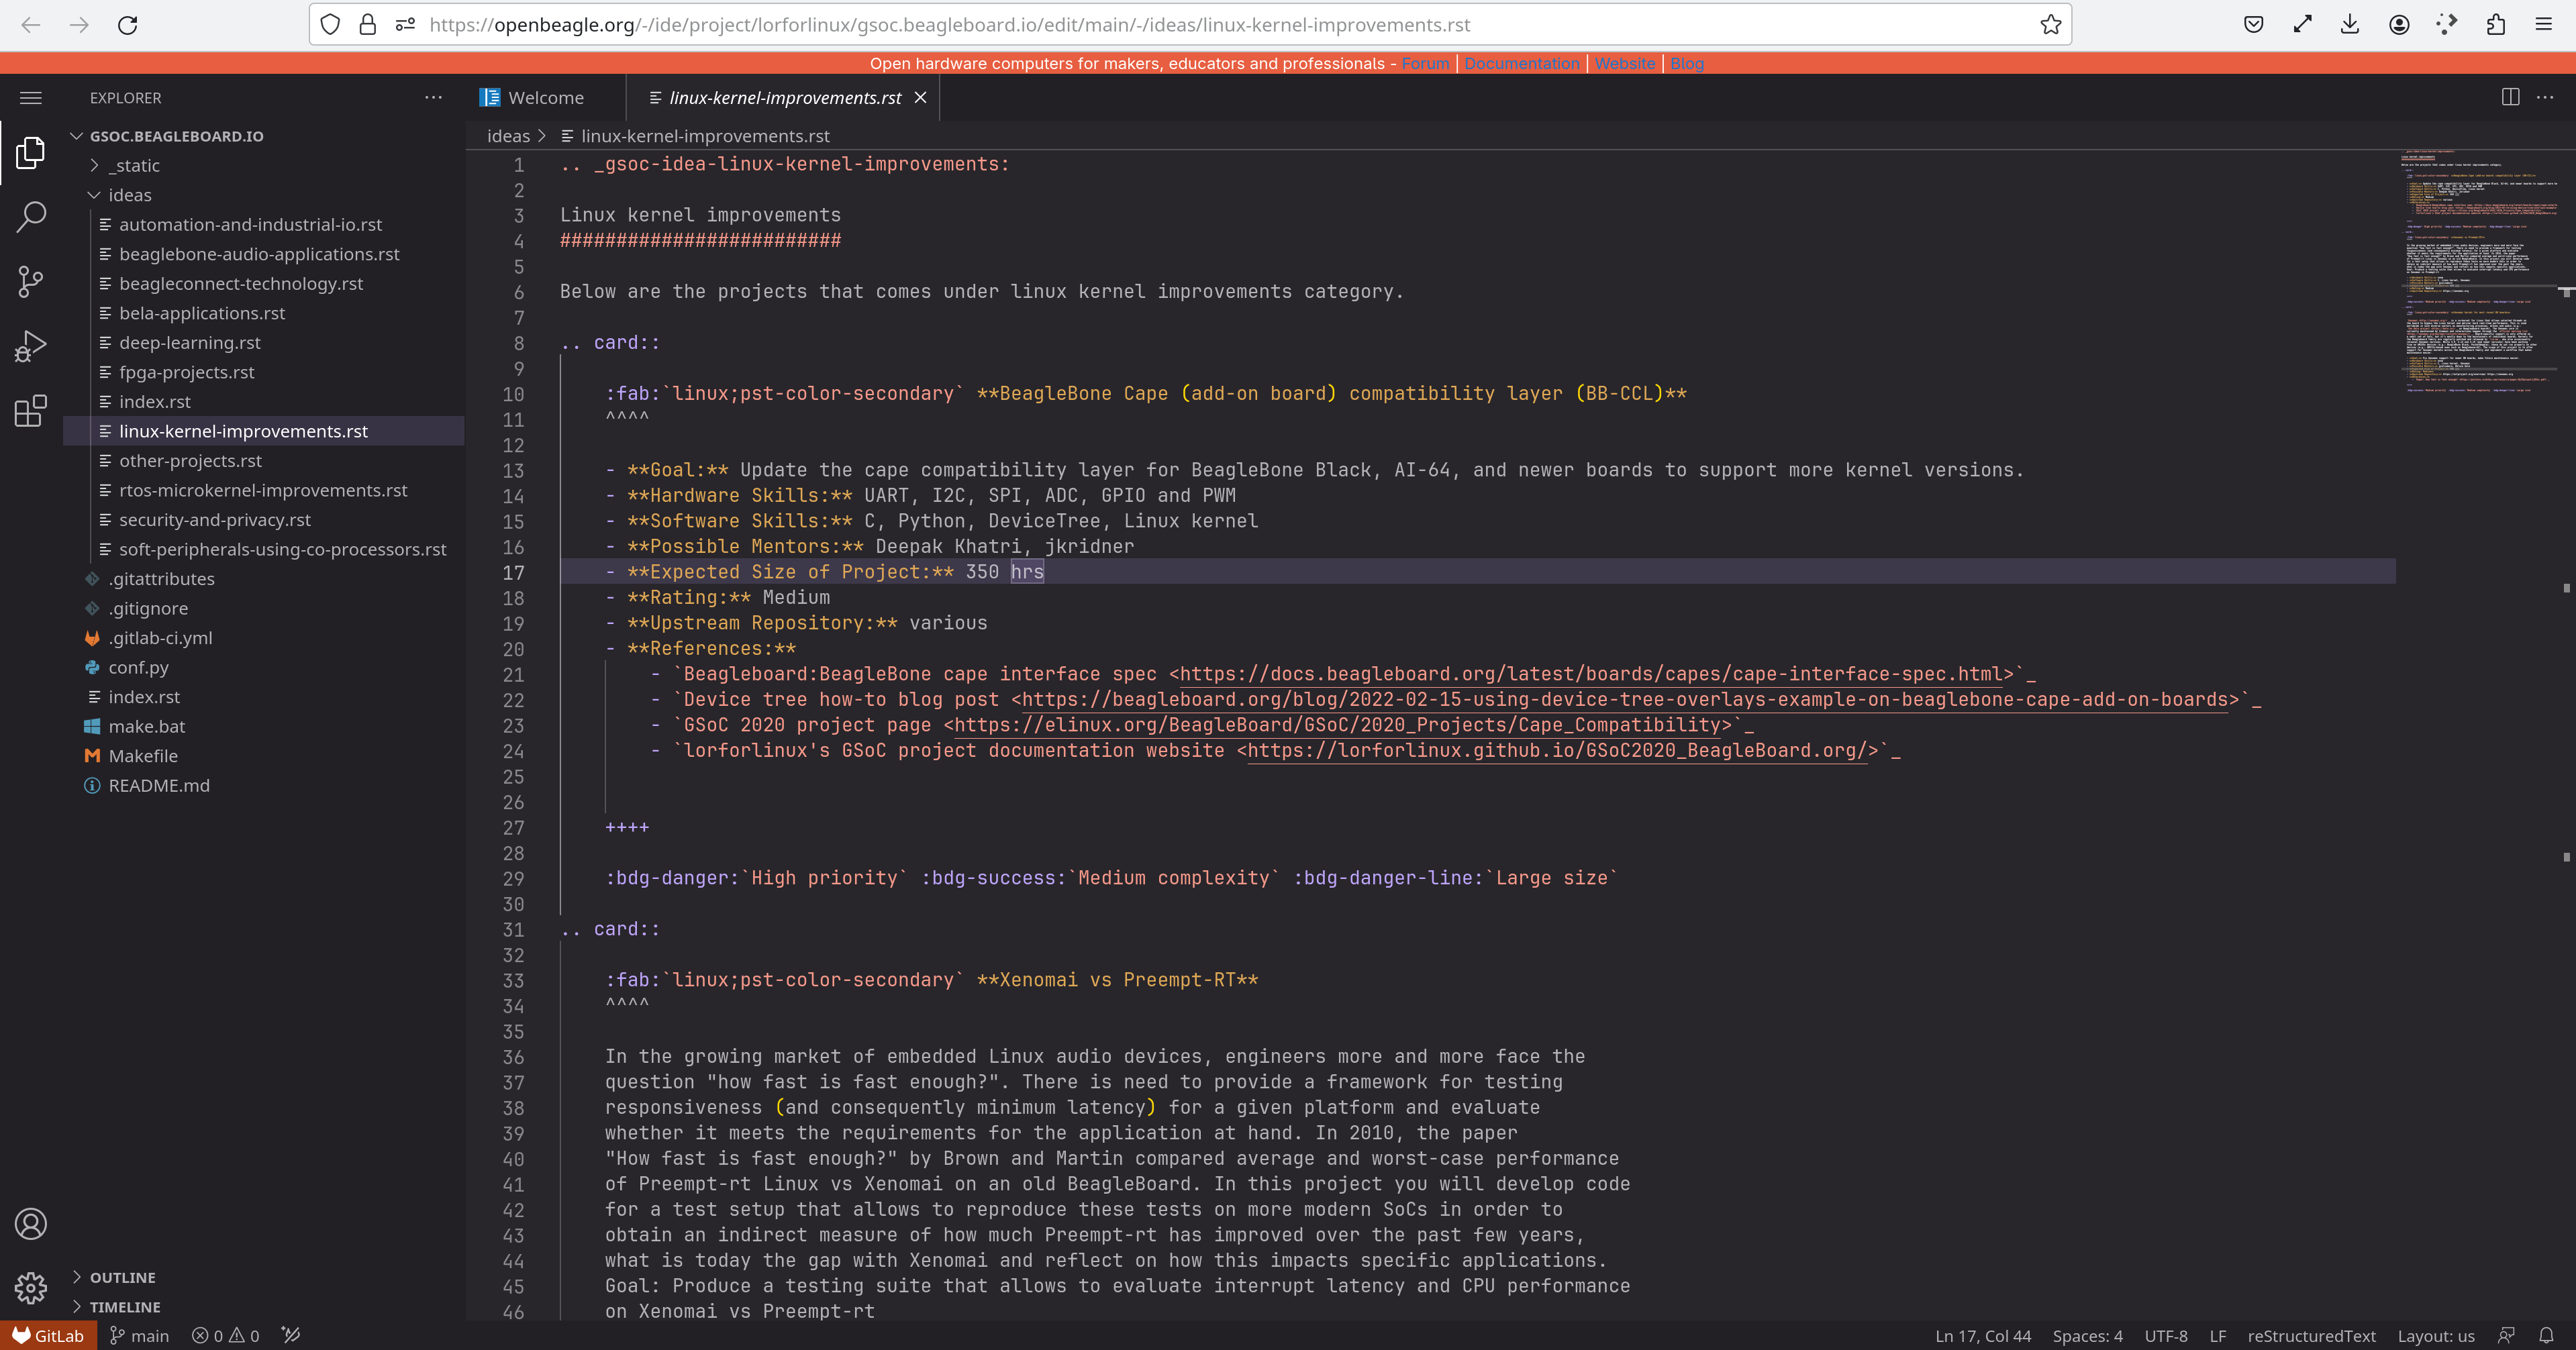
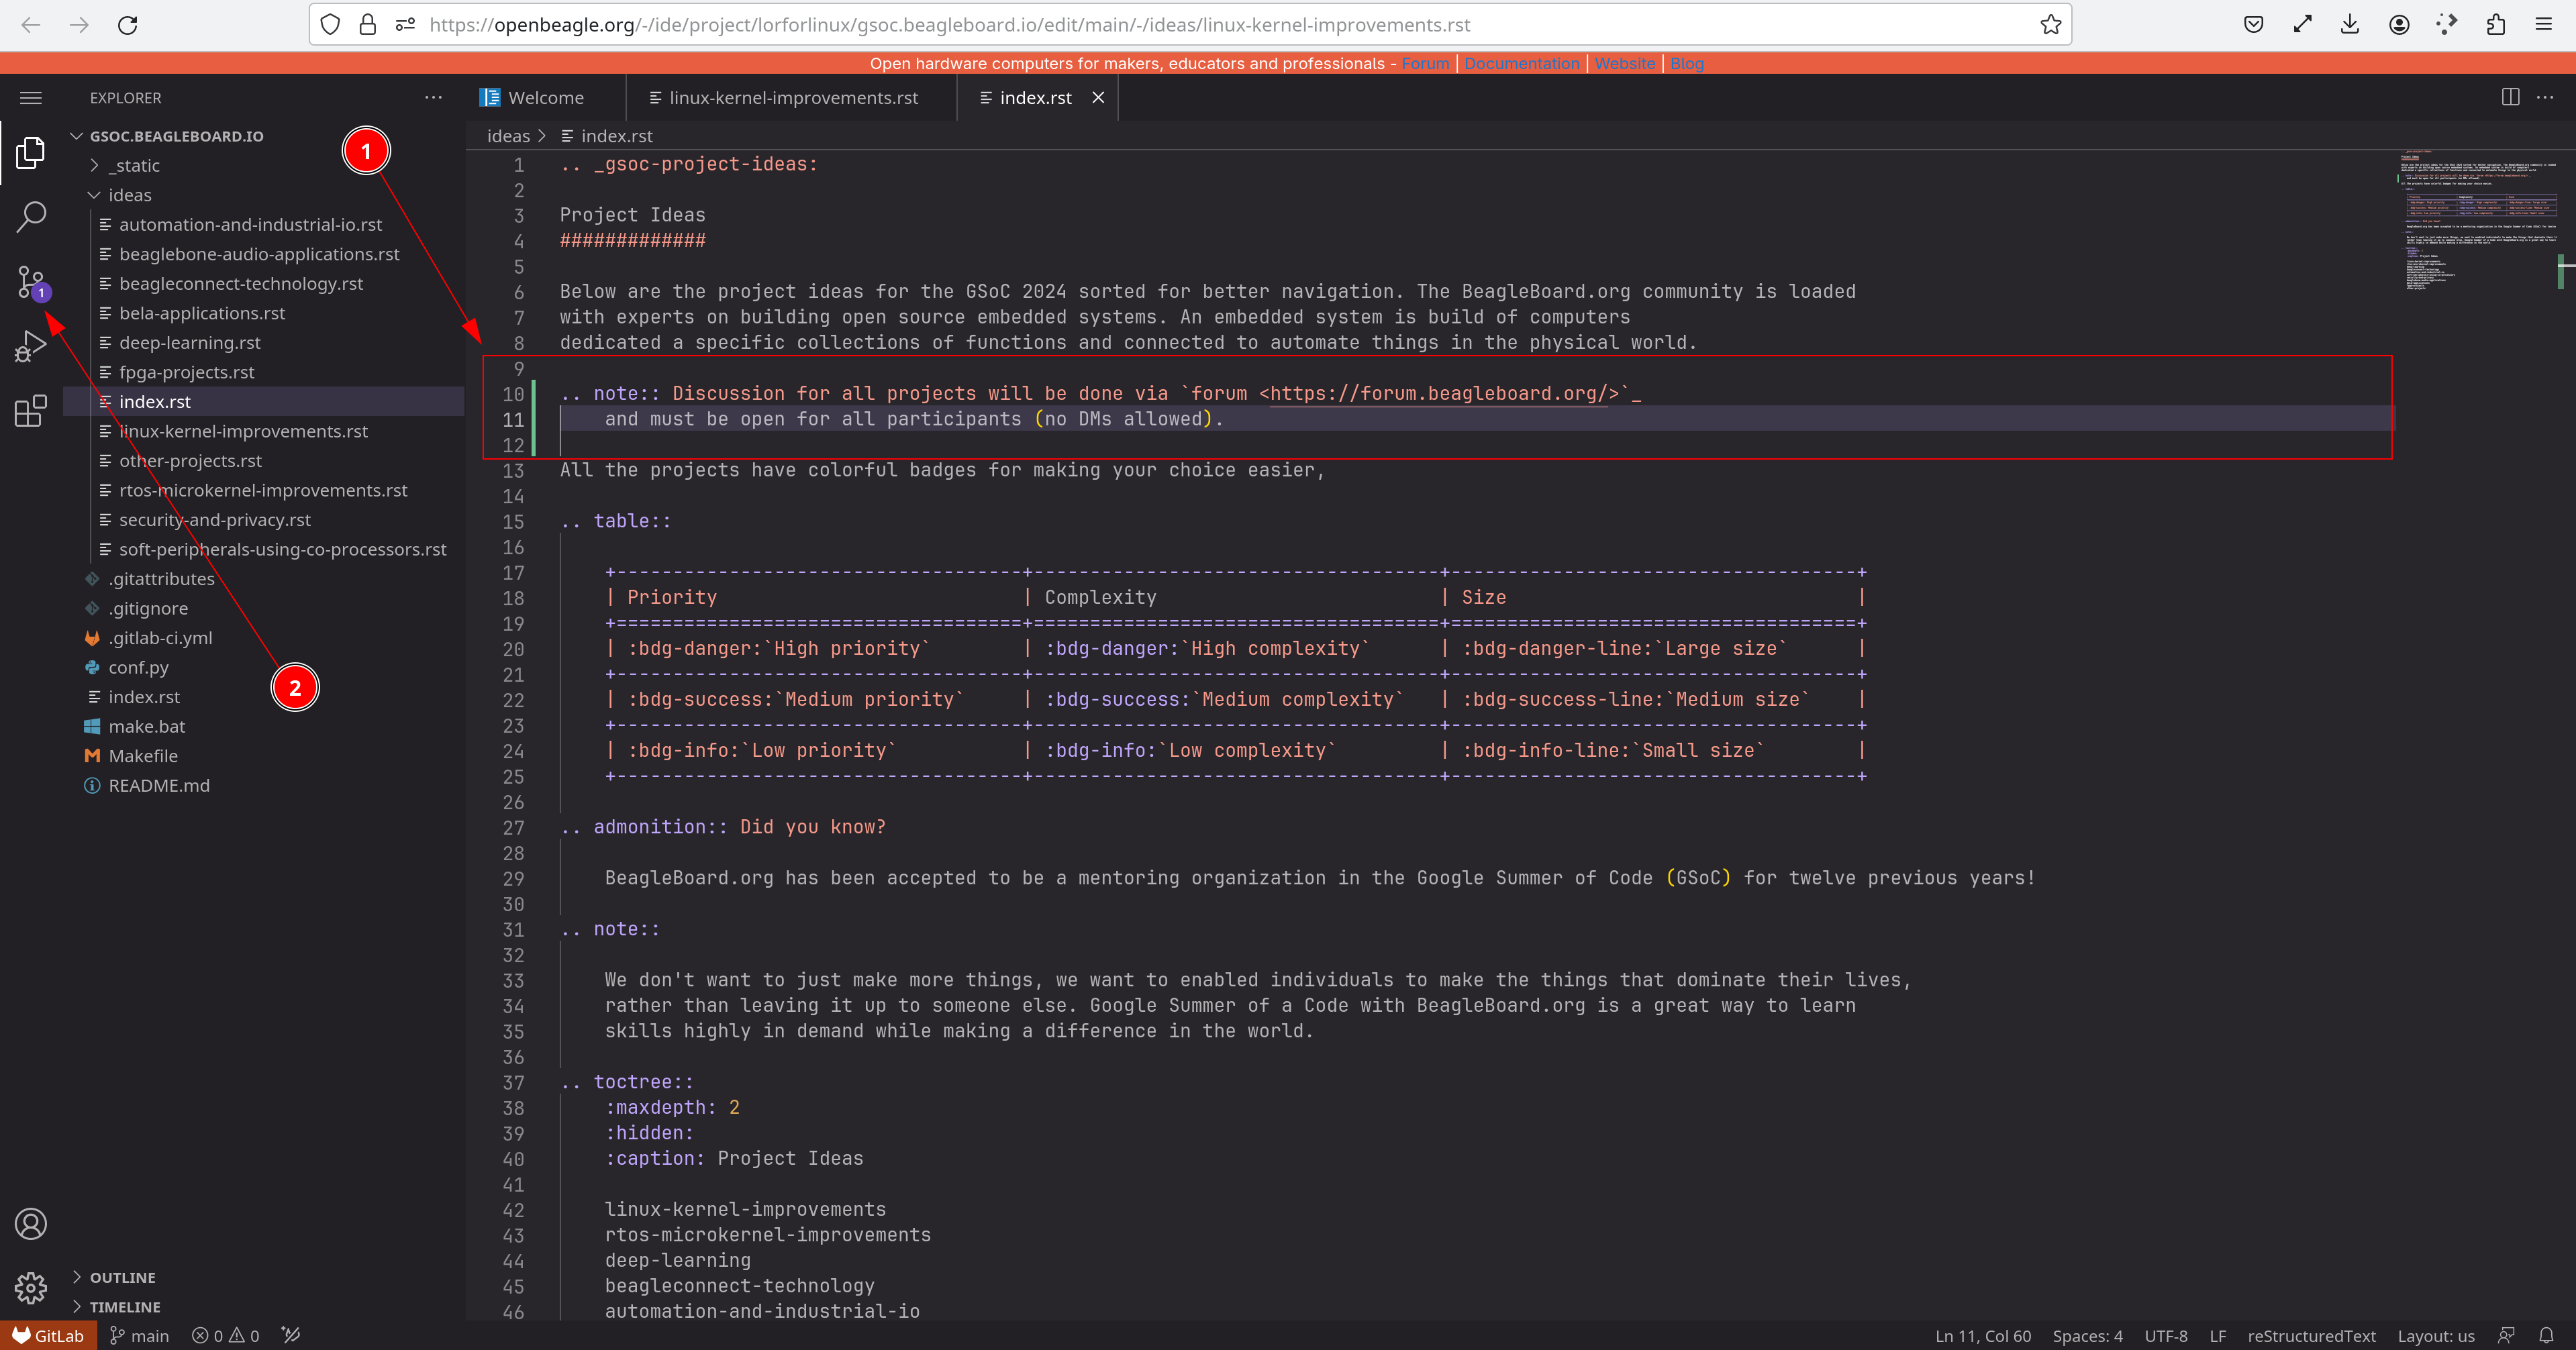
Now you have to select a file and start editing. Below image shows some,
Edits made to the ideas/index.rst highlighted with green bar on left side of code editor window near line numbers.
Source control button indicating (1) file updated in the repo.
Tip
Just like you do on your normal Visual Studio Code desktop application, to commit your changes you can either
click on Source control ( ) button or press CTRL + SHIFT + G to see all the edited files.
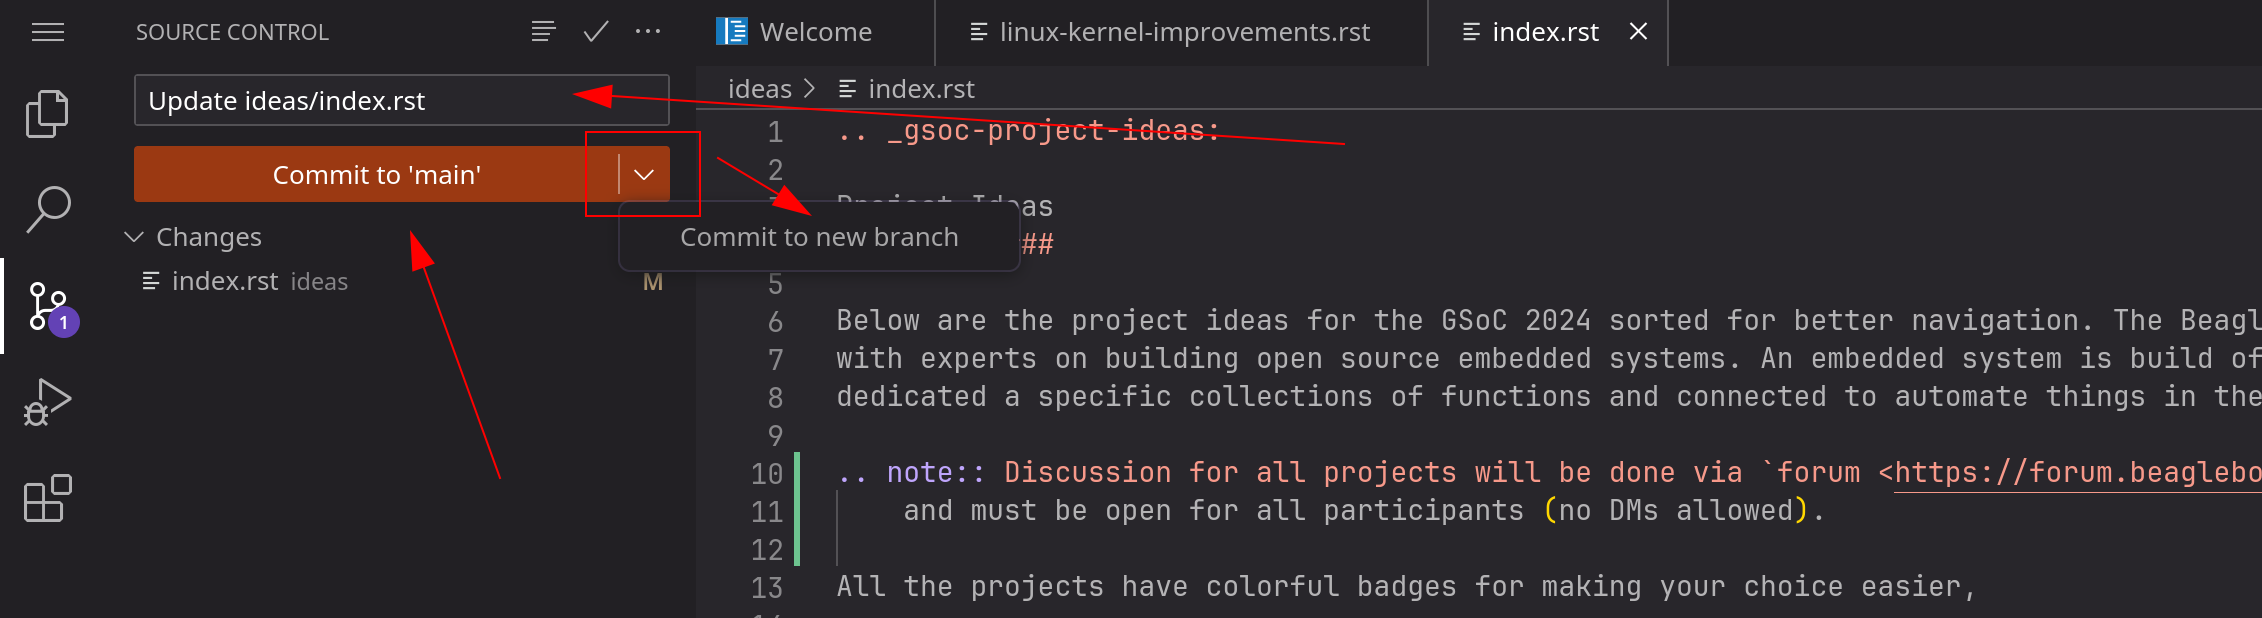
After switching to source control you have to,
Add a commit message in the input field.
Click on
Commit to mainbutton or click on drop down button to chooseCommit to new branch.
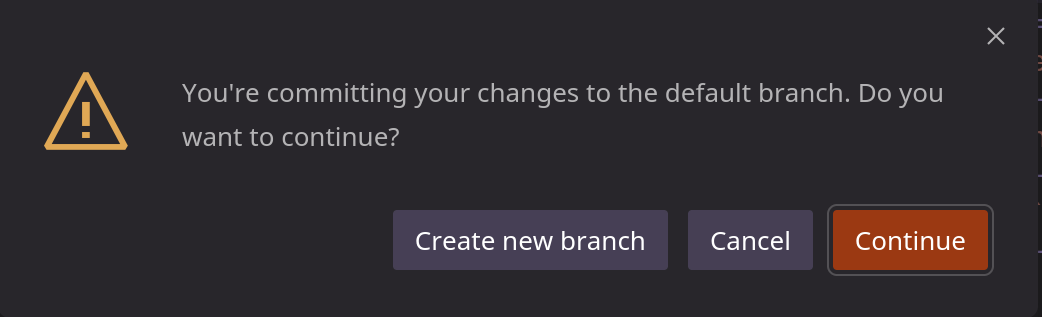
After clicking Commit to 'main' button you’ll be prompted with a window (shown below) with three options,
Create new branchCancelContinue
Click on Continue button if you want to commit to main (default branch) if it’s a single edit or commit.
Click on Create new branch if you want to create a new branch and want to keep your main branch clean. Advantage
of creating a new branch is that assigned reviewer for a pull request / merge request can also add commits to your
newly created branch which is not possible for your main branch because it’s a protected branch by default.
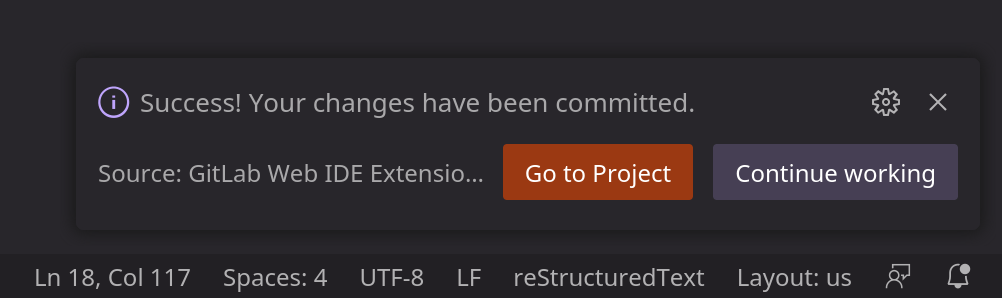
When all done right, at the lower right side of the Web IDE you’ll see a prompt showing Success! Your changes have been committed message with
two buttons,
Go to ProjectContinue working
If you click on Go to Project button, you’ll see the commit successfully applied as shown in the red box in the image below and the
green tick shown on the right side indicates that the CI build was also successful.
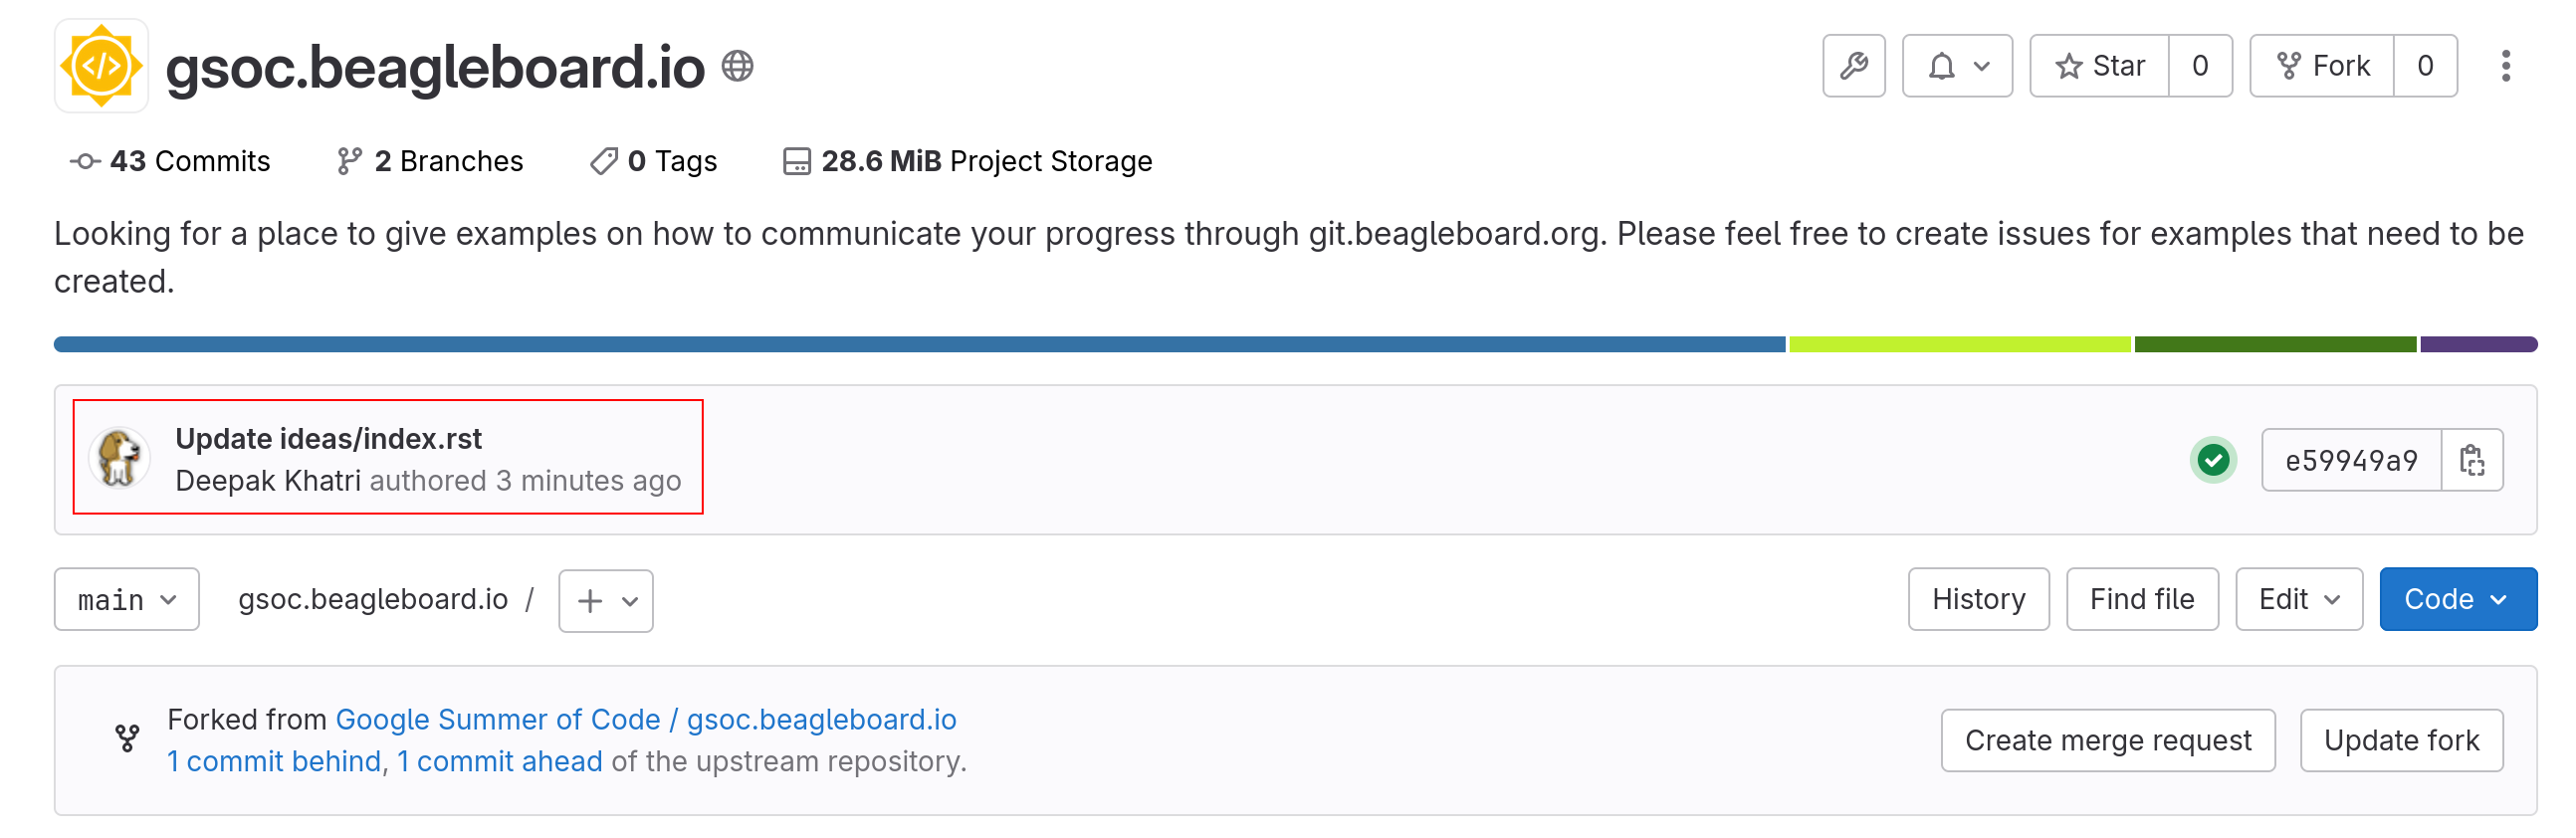
Congratulations!!
You have made a valuable contribution to an OpenBeagle project!
Create a pull request#
After making your changes and commiting them to your forked repo, you are set to create a new pull request / merge request so that those changes can be merged to upstream repo. To start your new PR, click on the dedicated button to create a new merge request and fill out all the details. The image below shows all the fields you have to update,
Provide a good title that reflects your work.
Add a detailed description of the work you have done. Add pictures whenever seems useful.
(Optional) you can assign it to yourself if you’ll be working on further updates or assign it to someone else who might want to work on the comments we may provide on your work.
Add
lorforlinuxorjkridneras reviewer for PRs with site content update or add your mentor as reviewer if it’s related to project work / proposal.If you want your commits to be shown as a single commit, then you can choose the
sqash commits ...check box.Check if all your commits are shown in the bottom of the screen and if everything looks okay, then click on
Create merge requestbutton.
Tip
If you are still working on some updates, you may also choose Mark as draft checkbox (below title)
which indicates that you are seeking feedback before making your commits suitable to merge.

Now wait for a review and, if comments are raised, then you can continue working on the project until everything looks perfect and your changes are merged in upstream.